B50: Open Sicilian (White)
A few words about the open Sicilian
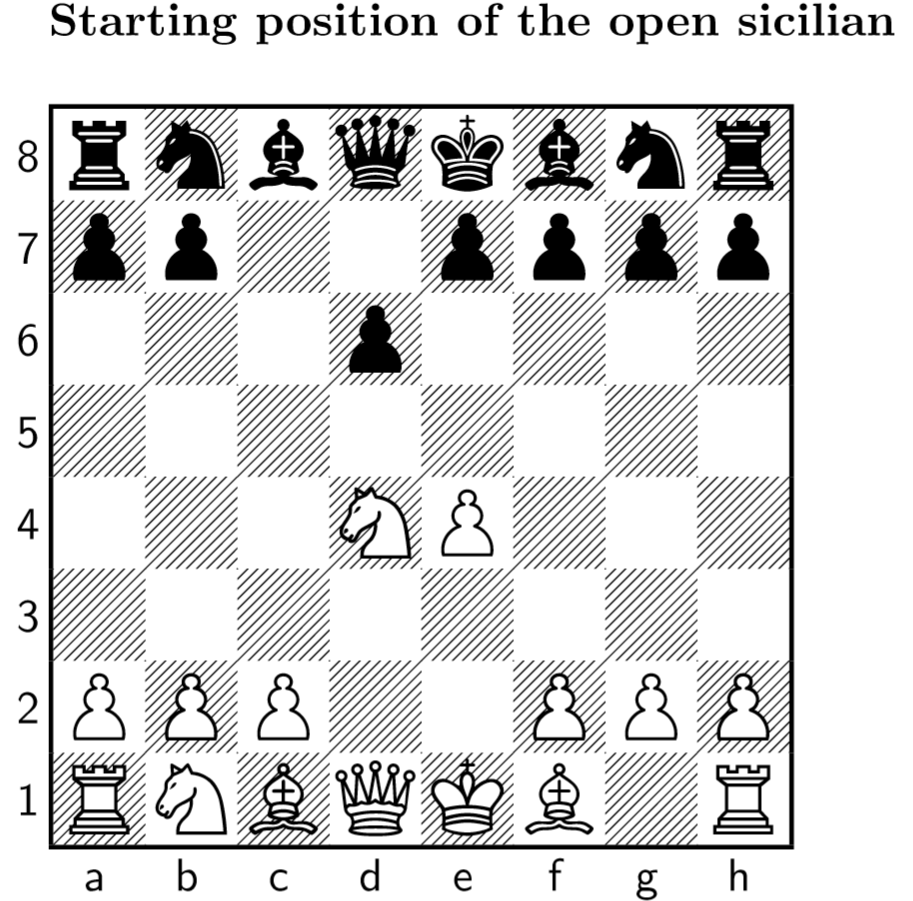
The sicilian defense (or sicilian) starts with the moves
A very popular continuation leads to the open sicilian,
From there, countless variations exist and the body of theoretical knowledge is massive with literally hundreds of books and video series dealing only with those. Famous ones are the Najdorf, the Dragon, the Sveshnikov and the Taimanov. Precisely for this wealth of theory I usually avoid any open sicilian.
The actual blitz game
The following gif from lichess shows how the blitz game went. I played as white and the time controls were 5 minutes with three seconds increment after every move.
I would divide the game in three parts: the first ten moves are the opening phase that builds a strong center and grabs space beyond the 4th rank. Then, moves 11 to 29 basically are a fight for the queen side resulting in an isolated black queen and a c-file that is occupied by white. Finally, starting with move 30 the focus shifts from the queen side to the king side ripping up the black pawn chain and delivering mate by move 37.
Analysis: Move by move
1 e4 c5 2. Nf3 d6 3. d4 cxd4 4. Nxd4: The open sicilian as covered above.
4 … a6: Already, this seems kind of slow. Better would have been 4 … Nf6 or 4 … g6.
5 c4: I immediately press forward with the common intention of building a strong center and keeping the knight on b1 from obstructing the c-pawn in the future.
5 … f6: This response from my opponent is already close to a blunder in terms of computer evaluation, assessing the position at > +2. I can only speculate about my opponent’s intentions but it seems the only purpose that pawn serves is preparing d5. On the downside, it creates a hole on e6 and prevents the knight from developing on f6. It also opens up queen moves to h5 checking the black king and hence future tactical possibilities.
6 Nc3 e5 7 Nf3 Nc6 8 a3: Preparing b4 and attacking the queenside. Interestingly, all four bishops are still undevelopped.
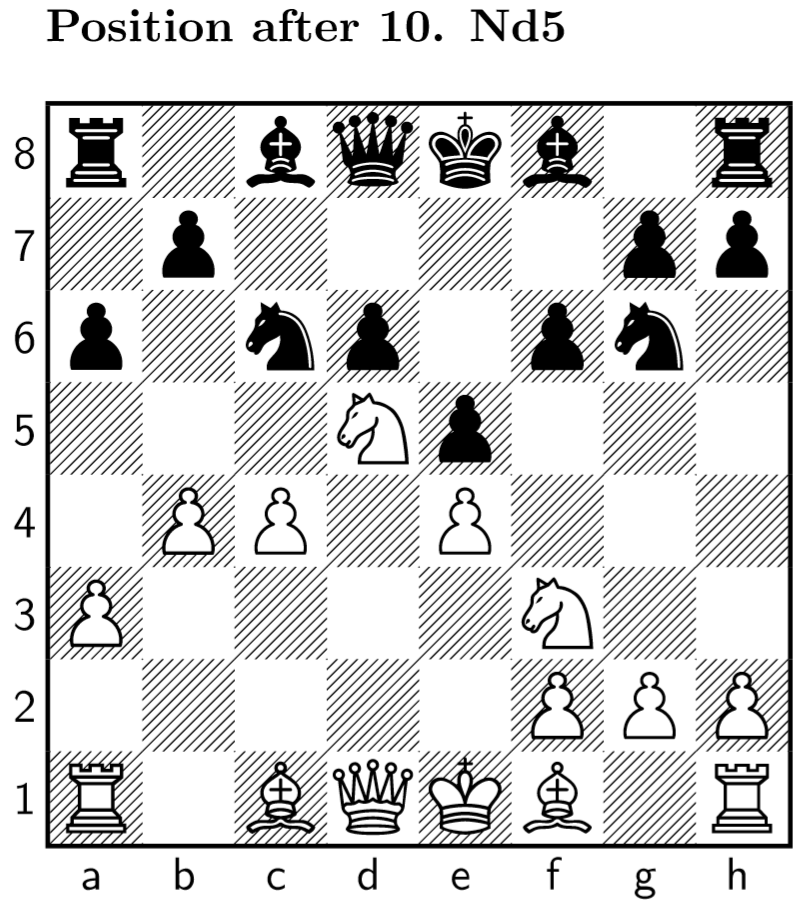
8 … Nge7 9 b4 Ng6 10 Nd5 Be6: According to the computer 10 Be3 would have been way more powerful, developing the piece and keeping an eye over the weak b7 square. The bishop move of my opponent is necessary to contest the strong white center.
11 Be2 Bxd5: This is also a blunder from my opponent with the position evaluation rising to +3. Two reasons probably are that (1) it cements a strong e-d-pawn chain in the center that can be reinforced by the knight or bishop in case of f5, and (2) giving up the light-square bishop against the knight significantly weakens the light squares in the long run.
12 cxd5 Nb8 13 Qa4+ Nd7: A cheapo attempt for luring my opponent into blundering 13 … b5 14 Bb5. After 13 … Qd7 I would have to return to d1, so all in all not a great attempt. A way more interesting plan provides the computer with 13 h4 !. Black more or less is forced to play 13 … h5 or otherwise the knight would need to reposition to e7 blocking in the dark-square bishop.
The king is then unable to castle and get to safety in the near future. The computer gives > +4 already. After 13 … h5 white can then sacrifice a full piece with 14 Ng5 fxg5 15 Bh5 and the computer indicates that black already needs to recapture with the rook in order not to be worse. The knight cannot be saved and Bg5 is around the corner with white having a tremendous position.
Next we can occupy the c-file with Rc1 and threaten to arrive at Rc8 with theoretical mating ideas. Very interesting computer line that deflects the queen to the kingside with the help of the bishops trying to enter it with the rook on the queenside later.
Needless to say, I did not see this idea in the game. :-)
14 O-O Be7 15 Bb2 O-O: The white bishop move loses a lot of advantage because it allows the knight to come f4. From there it can attack the light-square and dark-square bishop going to d3 and b2. The light-square bishop is due to the absence of the its counterpart a huge asset and an exchange with the black knight is therefore disadvantageous. Luckily for me, my opponent didn’t see this.
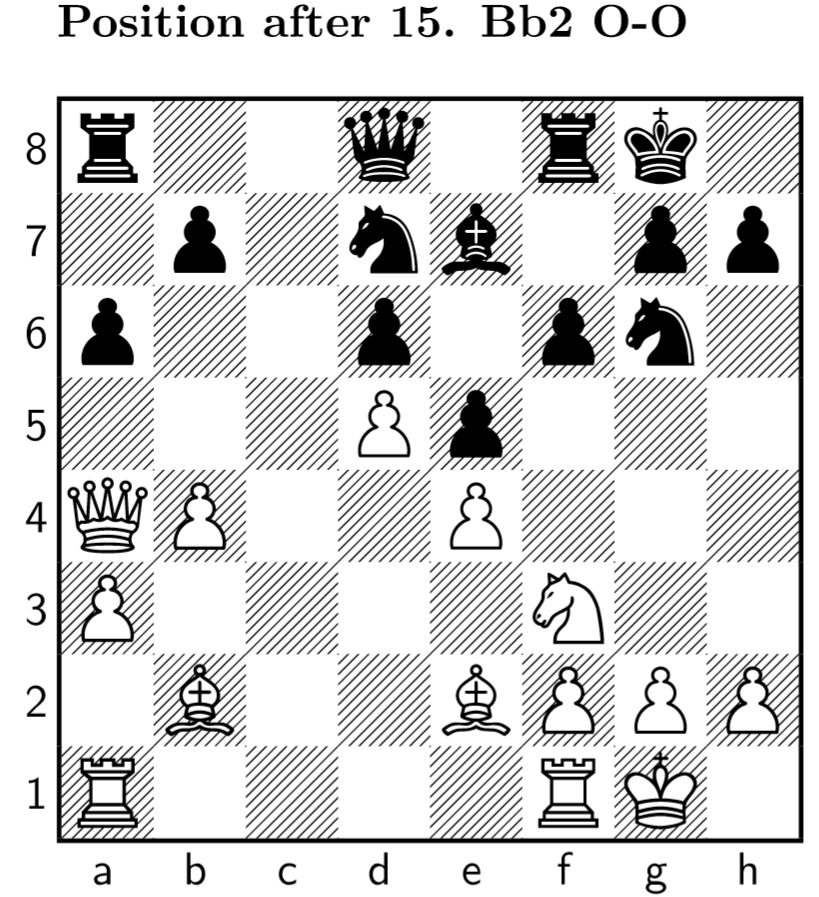
16 Rac1: Whereas the previous bishop move possibly weakened my position, this rook move makes the position equal. In other words, I completely throw away my advantage here. The idea is that, again, 16 … Nf3 hits hard and threatens to exchange itself for the bishop or, by saving the latter, forking rook and the other bishop. As a result, my position becomes incoherent and the pieces uncoordinated.
16 … Rc8 17. Nd2 Nb6 18. Qb3 Nf4 19. Bf3 Nd7 20. g3 Ng6 21. Nc4 b5 22. Na5 Qb6 23. Nc6: I finally landed on c6 having a wide reach into the opponent’s position. The black queen is more or less isolated only having one good square to go to.
23 … Rc7 24. h4: This more or less initiates the attack on the kingside.
24 … Bd8 25. Bg4 Ne7 26. Nxe7+ Bxe7 27. Rxc7 Qxc7 28. Rc1 Qa7 29. Kg2 g6 30. Be6+: I install the light-square bishop deep in black’s camp with check. It’s almost impossible for black to dislodge it as the black knight cannot reach it in a few moves.
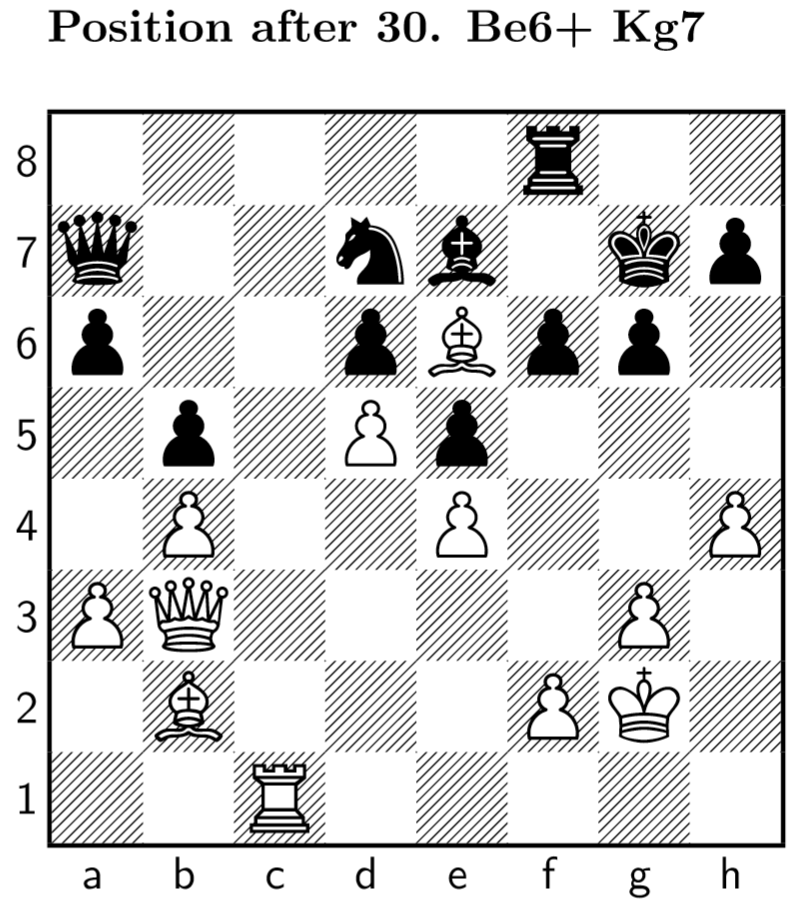
30 … Kg7 31. f4 Qb7 32. f5: I want to break open the kingside by making the g-pawn or h-pawn flinch and then swiftly swarm in with queen and rook. Black has counterplay though with e.g. Rc1 vacating the square for the knight which might put pressure on the light-square bishop as well as attacking the white rook on the open file.
32 … g5 33. hxg5 fxg5 34. Qf3: A rather large mistake from my opponent and a suboptimal response from me. Better than 33 hxg5 would have been an immediate queen move with Qf3 as now black can resist further with 34 … Nf6 . f6 was previously occupied by the pawn and hence inaccessible. However, white is still dominating the board and attacking the black king.
34 … Bf6: This move loses the game to the very strong 35 Rh1 !. Here the move order is crucial! The queen move that was played instead is too slow. The black king is able to hide on h8. In contrast, this is not possbily after 35 Rh1 as then the simple rook sacrifice 35 … Kh8 36 Rh7 Kh7 37 Qh5 gives a mate in two!
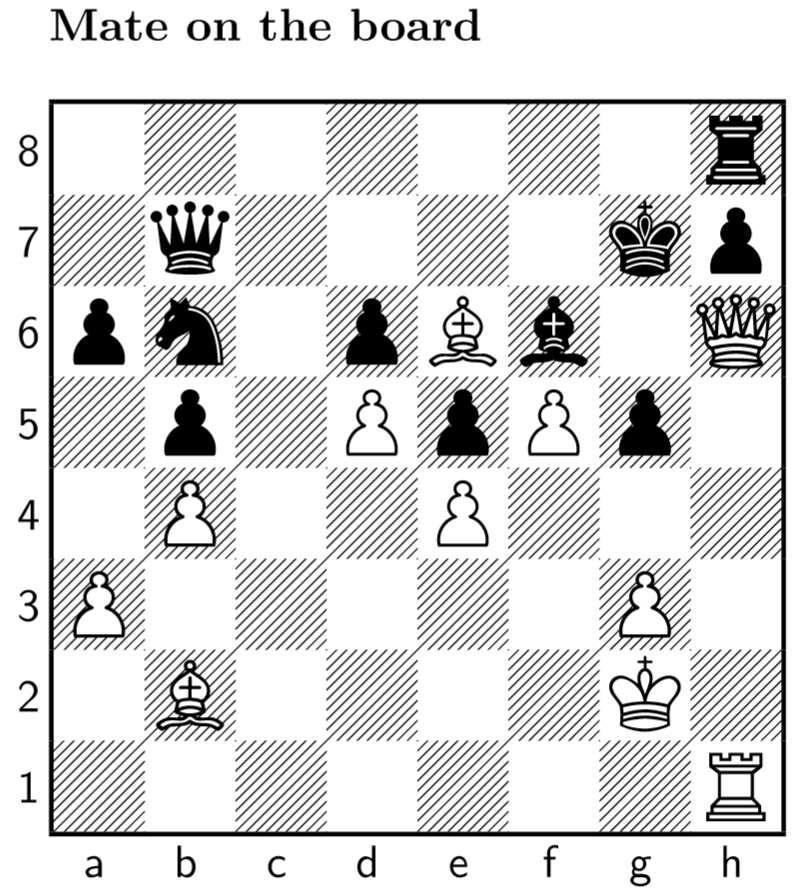
35. Qh5 Nb6 36. Rh1 Rh8 37. Qh6#: Finally, my opponent blunders the mate in one. 1-0
Insights:
I at least got the following insights out of the analysis.
The bishop pair, and especially the unopposed light-square bishop, was key in the endgame attack on the kingside. It definitely is worthwhile to check whether one systematically weakens squares with a capture. In this case, my opponent definitely weakened her light squares and I made good use of it later. Also, the position was close to equal again after I missed the opportunity for black to neutralise the bishop pair making my pieces uncoordinated.
Instead of short tactical sequences as with move 13 I should try to think of a bigger picture plan to round up my opponent’s defense. The computer line starting with 13 h4 is very clever and leads to interesting positions.
I missed the better mating sequence due to a lack of depth in calculating the variations.